Residential Solar Setup in Japan – Installation Workflow for Private Homes
The workflow for installing solar panels on a private residence in Japan usually follows a structured sequence. This includes initial consultation, roof measurement, component preparation, and secure mounting. Electrical connections are made by qualified technicians, followed by performance checks to confirm that the system operates as intended. Each stage aligns with local building and electrical standards.

What are the key workflow stages in residential solar panel installation?
The installation of a solar panel system for a private home in Japan typically involves several key stages. The process begins with a thorough site assessment, where professionals evaluate your property’s solar potential. This is followed by system design, which takes into account your energy needs and roof characteristics. Next comes the permitting phase, where necessary approvals are obtained from local authorities. The actual installation stage involves roof preparation, panel mounting, and electrical setup. Finally, the system undergoes testing and inspection before being commissioned for use.
How is roof measurement and preparation carried out?
Accurate roof measurement is critical for a successful solar panel installation. Technicians use advanced tools like laser measuring devices and drone technology to precisely map your roof’s dimensions, slope, and orientation. They also assess the roof’s structural integrity to ensure it can support the added weight of solar panels.
Preparation steps include cleaning the roof surface and making any necessary repairs. In some cases, reinforcement of the roof structure may be required. The team will also identify the optimal locations for panel placement, considering factors such as shade from nearby trees or buildings, and plan the most efficient layout for maximum sun exposure.
What techniques are used for mounting panels securely on residential structures?
Securely mounting solar panels is crucial for long-term performance and safety, especially in a country like Japan that experiences frequent seismic activity. Installers typically use a racking system specifically designed for the roof type – whether it’s tile, metal, or flat. These systems are engineered to withstand high winds and potential earthquakes.
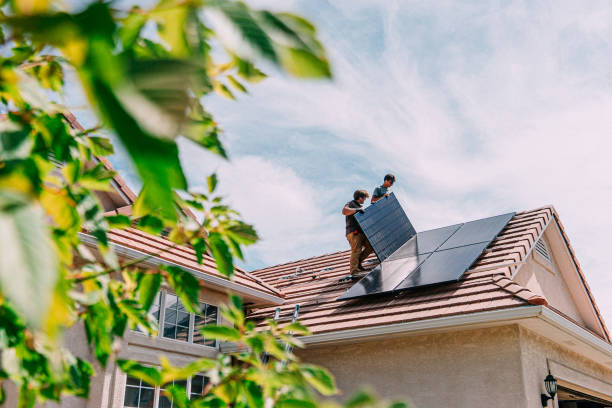
For pitched roofs, installers often use a combination of roof hooks, rails, and clamps to secure the panels. On flat roofs, ballasted systems or penetrating mounts may be employed. The mounting process involves carefully attaching brackets to the roof structure, ensuring proper waterproofing at all attachment points. The panels are then securely fastened to these brackets, creating a stable and durable installation.
How is electrical wiring and inverter setup handled?
The electrical component of a solar installation is complex and should only be handled by certified professionals. After the panels are mounted, electricians begin the process of wiring them together in series or parallel, depending on the system design. These wires are then routed through protective conduits to the inverter location.
The inverter, a crucial component that converts DC power from the panels to AC power for home use, is typically installed in a cool, dry location near the main electrical panel. In Japan, where space is often at a premium, compact wall-mounted inverters are popular choices. The electricians will also install necessary safety equipment such as disconnect switches and surge protectors.
What does system testing and inspection after installation involve?
Once the physical installation is complete, rigorous testing and inspection procedures are carried out to ensure the system’s safety and efficiency. This typically includes:
-
Visual inspection of all components and connections
-
Testing of electrical connections and grounding
-
Verification of proper inverter function and output
-
Performance testing to ensure the system is producing the expected power output
In Japan, a licensed electrical engineer must inspect and approve the installation before it can be connected to the grid. This inspection verifies compliance with local electrical codes and safety standards. After passing inspection, the system can be officially commissioned and connected to the utility grid, allowing the homeowner to start benefiting from solar energy.
What are the typical costs and providers for residential solar installations in Japan?
The cost of installing a residential solar system in Japan can vary significantly based on factors such as system size, equipment quality, and installation complexity. However, to give you an idea of the market, here’s a comparison of some providers and their estimated costs:
| Provider | System Size | Estimated Cost (JPY) | Key Features |
|---|---|---|---|
| Panasonic | 4 kW | 1,500,000 - 2,000,000 | High-efficiency panels, 25-year warranty |
| Kyocera | 5 kW | 1,800,000 - 2,300,000 | Made in Japan, robust design for weather resistance |
| Canadian Solar | 6 kW | 2,000,000 - 2,500,000 | Cost-effective, good performance in low-light conditions |
| SunPower | 4 kW | 2,200,000 - 2,700,000 | Premium panels with highest efficiency ratings |
| Sharp | 5 kW | 1,700,000 - 2,200,000 | Long-standing reputation, reliable performance |
Prices, rates, or cost estimates mentioned in this article are based on the latest available information but may change over time. Independent research is advised before making financial decisions.
The installation of a residential solar system in Japan involves a well-defined workflow that ensures safety, efficiency, and compliance with local regulations. From the initial roof assessment to the final system inspection, each stage is critical in creating a reliable and productive solar energy system for your home. By understanding this process, homeowners can better prepare for their solar journey and make informed decisions about their energy future.


